Making your own DIY water change system!
Like most things in South Africa, our water and sanitization systems are failing, and depending on where you stay it is no longer safe to put tap water straight into your aquarium no matter how much de-chlorinator you throw at it. And I now also find myself in this group, unfortunately. For the last month or two, each time I did my water change the water in my aquarium would become super cloudy, I tested both the tap water and my aquarium water, but all readings looked fine. So I decided to open my wallet (unfortunately) and make my own DIY water change system. Just note that how I made it and what I needed might be different from what you will be doing due to tank size.
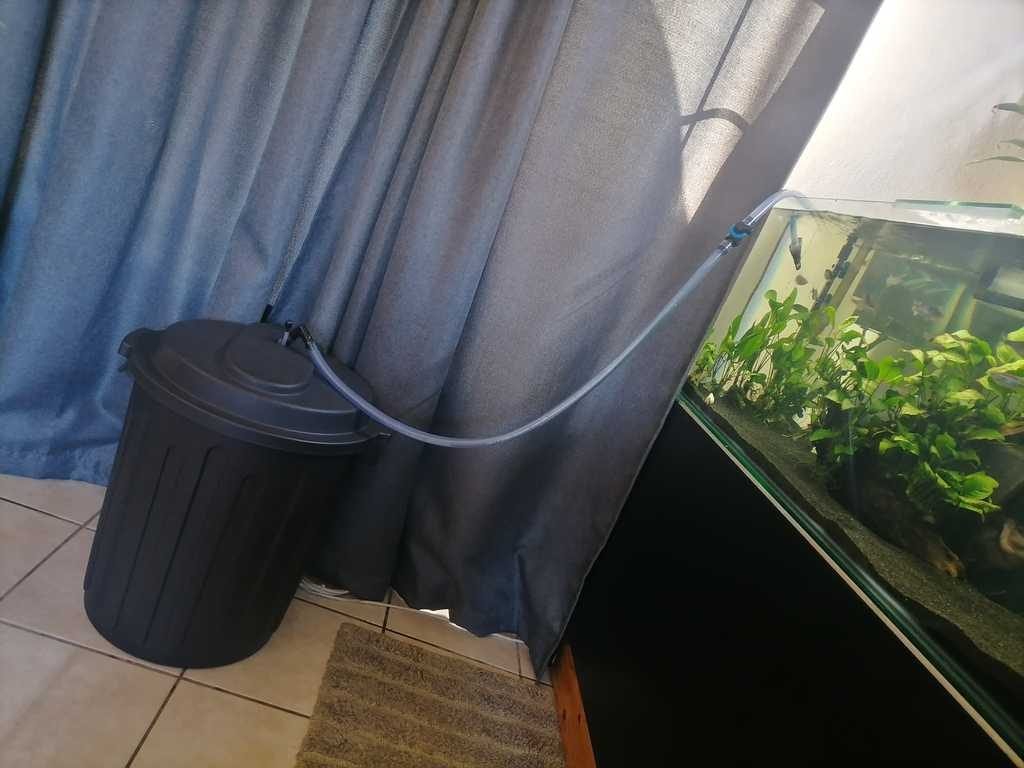
Not to mention the amount of water you need to change and the layout of your aquarium. This will just give you a rough idea of costs and the materials needed to build your own setup. So let’s get right into it, shall we! So what exactly will you need for an aged water DIY setup? Let’s do a quick checklist of things you will need:
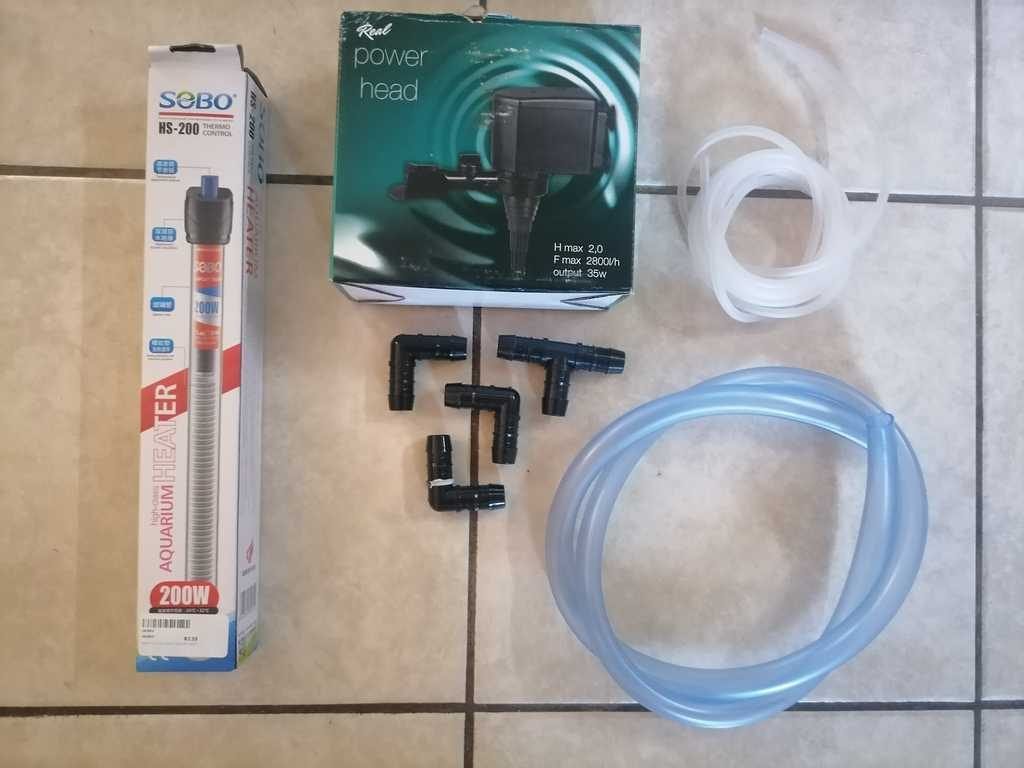
- A Plastic Bin (With lid) that is 25% of the total volume of your aquarium. In this case, mine is a 60-liter bin, which I got at plastic land for around R60.
- A fountain pump or power head with enough head height (The distance it can pump the water up in your aquarium.) I picked a power head as it was the cheaper option. Which was around R230. But if you have one lying around, you can also save a bit of money here.
- An aquarium heater to heat your water if you want to pre-heat it for convenience’s sake. A cheap 200-watt will cost you around R130, but if you have a spare you can save some money here.
- 13 mm or 16 mm rubber tubing that is used for canister filters, depending on where you buy it, it can cost between R15 and R60 per meter. The length you would need will also vary depending on your setup. I paid R15 per meter and I required 4 meters, which gave me a total of R60 for the tubing. But I know many people have plenty of it lying around the house, especially if you keep fish.
- 13 mm or 16 mm Emjay Nylon Insert Coupling, and Emjay Insert Nylon Male Elbow connectors that are used in sprinkler setups. You can buy those at any builders for around R14 each. The amount used will depend on where your water bin is located. I used about two of each, so it cost me around R60.
- A 13 mm or 16 mm Emjay Insert Flow Control Valve which is also used for things like sprinkler systems. They can be a bit expensive, but I got mine from Builders Warehouse for R119.
- Electronic timer, this is optional but makes things super convenient. You set the timer to heat and circulate your water a day beforehand, and let it switch off just before you start the water change.
- Bag of aquarium salt which is around R90 and de-chlorinator R160.
So in total for a setup like mine for a 350-liter aquarium, you are looking at around R 615 minus the aquarium salt and the de-chlorinator people might already have, but you can definitely save some money if you have some of the equipment lying around. Next, I will list the tools you need to put all these things together
- A pair of sharp scissors to cut the rubber tubing.
- Measuring tape, so you can measure the right amount of rubber tubing you will be using.
- Drill or anything sharp enough to cut a circular hole in the lid of your plastic bin.
- Some warm water in a cup, you will dip the end of the rubber hose in it, so you can more easily attach the fittings to the pipes.
So now that we have all the items and equipment that you will need let’s put this bad boy together shall we?
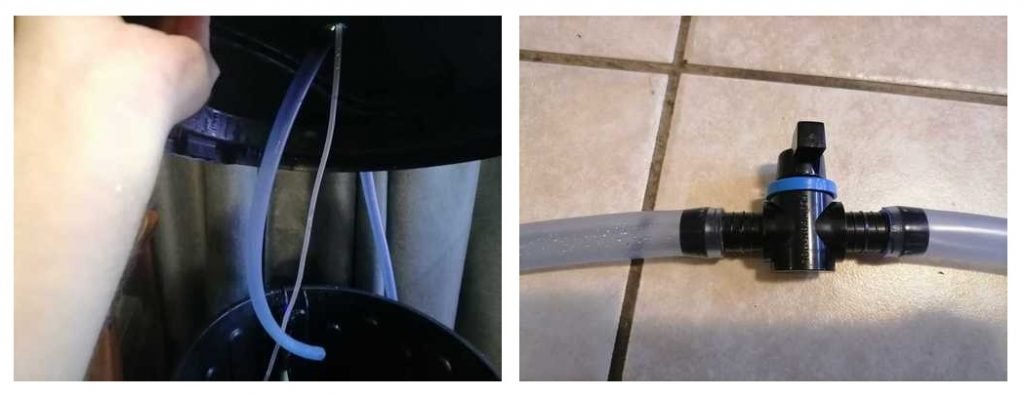
- First, you will need to drill or cut a hole in the lid of your plastic bin that you can thread your 13 mm or 16 mm pipe through. And just enough space for the pump’s venturi system (The air tube you attach that allows the pump to suck air into your water.)
- Then thread your 13 mm or 16 mm pipe through the hole and give enough slack so that you can remove the lid so that you can add water and do maintenance on the system.
- Place your pump at the bottom of your plastic drum, then cut a small 5-10 cm piece of rubber tubing and attach it to the outlet of your pump. Then grab an Emjay Nylon Insert Coupling you will use this as your “quick release” which I will explain later.
- Then connect the 13 mm or 16 mm pipe that you threaded through the hole to the other side of the coupling and attach the airline tubing needed for the venturi system. (The air pump pulls air through this tube and injects it into the water.)
- Attach your heater to the side of the plastic bin.
- Once you are done with the above, you can close the lid and see if everything fits properly.
- You should now have a very long piece of pipe running from your plastic bin. From there you can plump it however you need. But I would recommend either using an Emjay Nylon Insert Coupling, or an Emjay Insert Nylon Male Elbow connector relatively close to where the pipe exists out of the plastic bin.
- Use your remaining Emjay Nylon Insert Coupling or Emjay Insert Nylon Male Elbow to plumb your way into your aquarium.
- Grab the Emjay Insert Flow Control Valve and install it right before the pipe enters your aquarium, this way you can easily reach and control it should you need it.
- I then took the inlet protector from the power head and glued it onto the end of the water change system so when the water leaves the pipe and enters the aquarium that it does not disturb the substrate, plants, or your fish and other livestock.
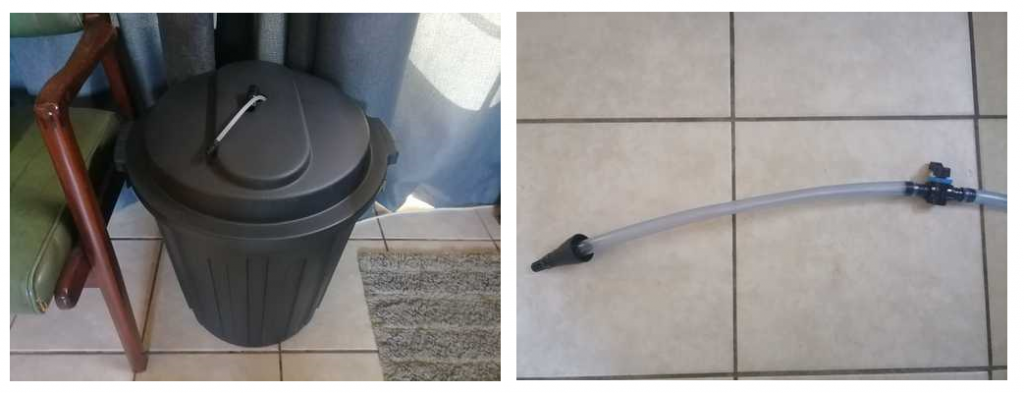
Now that you are done, check that everything is properly fitted and we are almost ready to add the water. Add one level spoon of aquarium salt for every 20 liters of aquarium water (This is totally optional) then add your de-chlorinator and fill your bin. Make sure that the little “quick release” is not attached so the rest of your DIY water change system, so that the water can be circulated inside the plastic bin. Switch on your pump and your heater and leave for 7 days, or until you do your water change. When it is time to change your water, switch off your pump and attach the “quick release” to the rest of the system. And make sure your valve is closed switch off your heater and when you are ready switch your pump back on again. And slowly open your valve until the water starts flowing into your aquarium at the desired rate. Once you are done, switch everything off, fill up your plastic bin again and follow the above steps again. Simple as that! And there you have it, your own DIY water change system.
[Editorial Note:] This is just one of many ways you can do this, and I am sure there are other improvements you can make to this system


