Making your own DIY aquarium plant fertilizer
Times are tough and with the price of everything just going up these days, it is not easy for the novice fishkeeper interested in keeping live plants to always afford the expensive liquid and root tab fertilizers that are on offer in the shops. But don’t fear my fellow fishkeepers! I am here once again to save you and your wallet. But we will be discussing today is how to make your own DIY liquid plant fertilizer and root tabs, and the best thing about this it is cheap, and it will last you much longer than store-bought products. So let’s get started with making your own liquid fertilizer. We will be using the EI (Estimative Index) method by Tom Barr, what it boils down to is the fertilizer that you add is more than what is required by your plants so that the plants never have a shortage of any nutrients. Besides light and Co2, your aquarium plants need two different types of nutrients: Macronutrients (NPK) and Micro (Trace) nutrients.
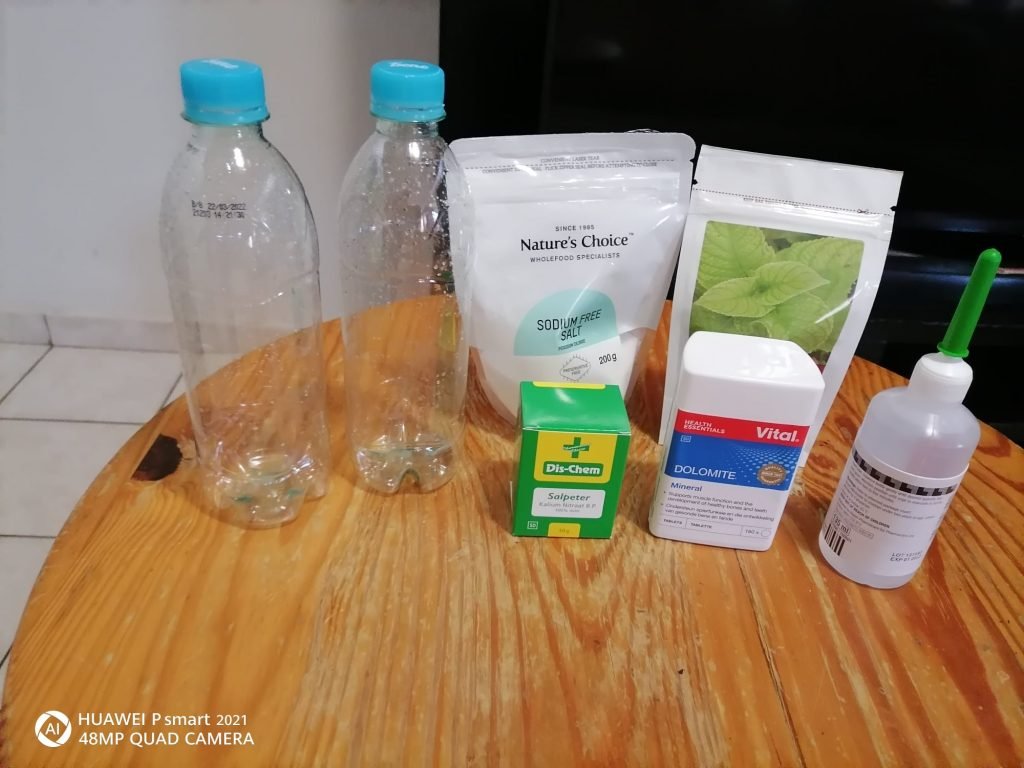
Macronutrients are the nutrients that your plants need in large amounts, which include: Nitrates, Phosphates, and Potassium. Micronutrients are iron, magnesium, and calcium. They are just as important as macronutrients, but plants don’t need them in such large quantities. We will start with Macronutrients (NPK) ingredients and where to find them. N – Nitrates = Saltpeter (Dischem or any big pharmacy), P – Phosphates = Lenolax (Dischem or any big pharmacy), and K– Potassium = Natures-“No Salt” (Dischem in the healthy foods section). The next ingredients are Micro (trace) nutrients. Iron (Starke Ayres Iron Chelate Doy Pack (100g) Builders Warehouse). Magnesium and Calcium: Dolomite pills (Dischem or any big pharmacy). When you have all your ingredients, you are ready to go
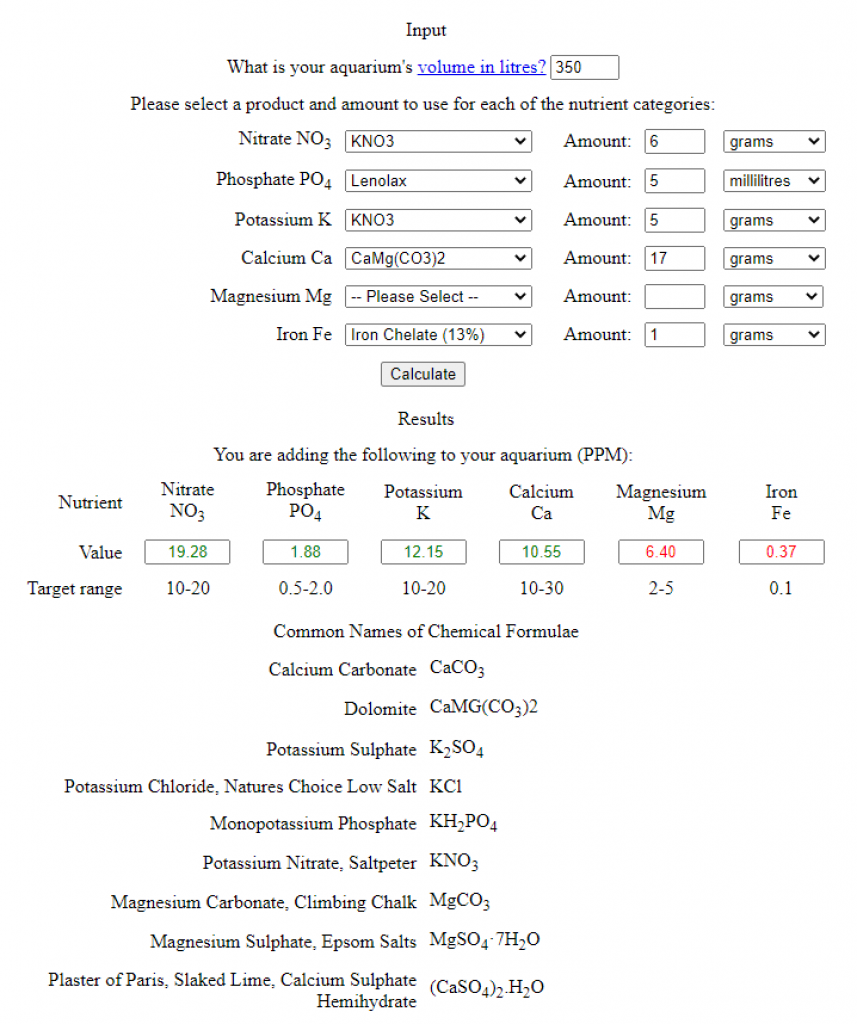
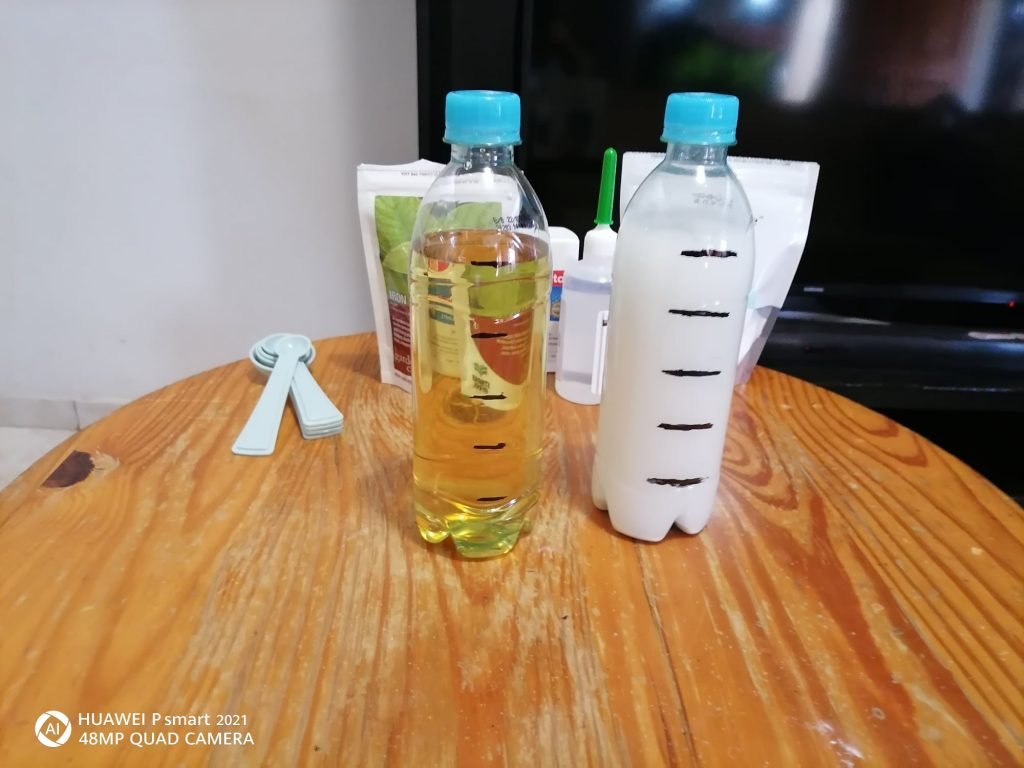
I will use my aquarium as an example, its volume is 350 liters, so I enter the volume and the amounts for each nutrient and press calculate. The aim is to get the figures for each nutrient to show as green or as close as possible to the target range. If you are a bit over, don’t worry about it. You will see that I did not enter anything for magnesium because dolomite caters to both Calcium and Magnesium. When you have your amounts, use an electronic scale to measure the grams or a measuring spoon. Now get two bottles of 500ml each. And divide it into five parts of 100 mL each. Add the NPK and Dolomite (You need to crush the dolomite into a powder) to one bottle. And the Iron (Starke Ayres Iron Chelate) in the other bottle. The reason for this is that you shouldn’t add Phosphate, Calcium, and Magnesium together with iron as it binds with the iron, so plants cannot absorb it.
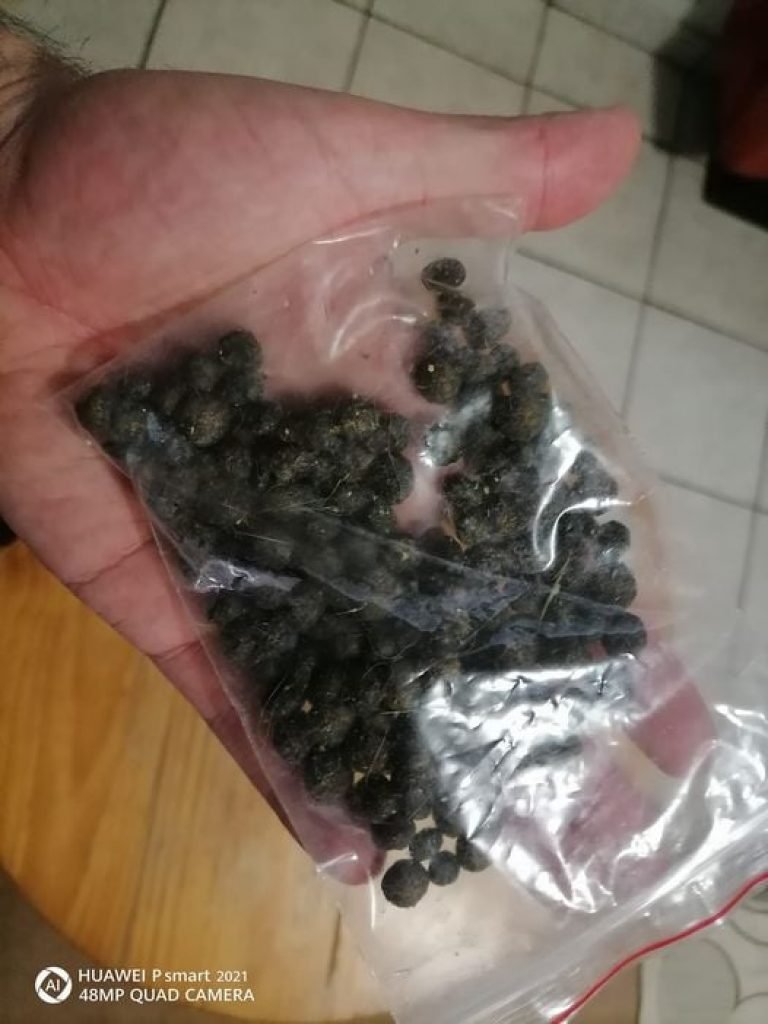
Shake the bottles well and store them in the fridge. So how exactly should you dose your new shiny DIY fertilizer? It is really easy Monday through to Friday, you dose the NPK (White liquid) in the mornings. And at night 100ml trace, remember we don’t want it to bind with the other fertilizer. Saturdays you don’t dose anything and on Sunday you do your water changes and then start with a fresh new mixed batch on Monday again. Just as a side note, don’t shake the NPK (White liquid) before adding it to your aquarium otherwise everything will be covered in calcium sediment. Let it all just settle at the bottom of the bottle, which you can just flush out once you are making a fresh batch. Next up is DIY root tabs and for this, we will be using bunny poop. Yes, you heard correctly, we will use bunny poop!
So what are these root tabs I keep talking about and why is it important? In laymen’s terms, some plants absorb their nutrients through their leaves while others absorb most of their nutrients through their roots. This is where the bunny poop comes into play, bunny poop is good for Phosphates, Potassium, and Nitrates. Using it is really easy: Get a bunny have it poop. Then have that poop dry in the sun for about a week or so or till it is dry. Then insert around 2 of them next to the roots of each of your plants and as deep as possible so the fish cannot dig it up as it can get messy. You can add new ones every 3-4 months depending on how heavily planted your aquarium is.

